
The Kakobuy buying guide: eight official steps, explained
Follow the official purchasing sequence with the matching instructional images. Community terms appear only where they help explain the next action.
The official guide was checked on 15 October 2026. Its screenshots use an older interface: prices, coupons, routes and balances are examples, not current offers. Open any image for its full-size version.
The first payment buys the goods and domestic delivery. The international parcel is a separate payment at step 6. A community “GL” is an opinion, not a substitute for checking your item.
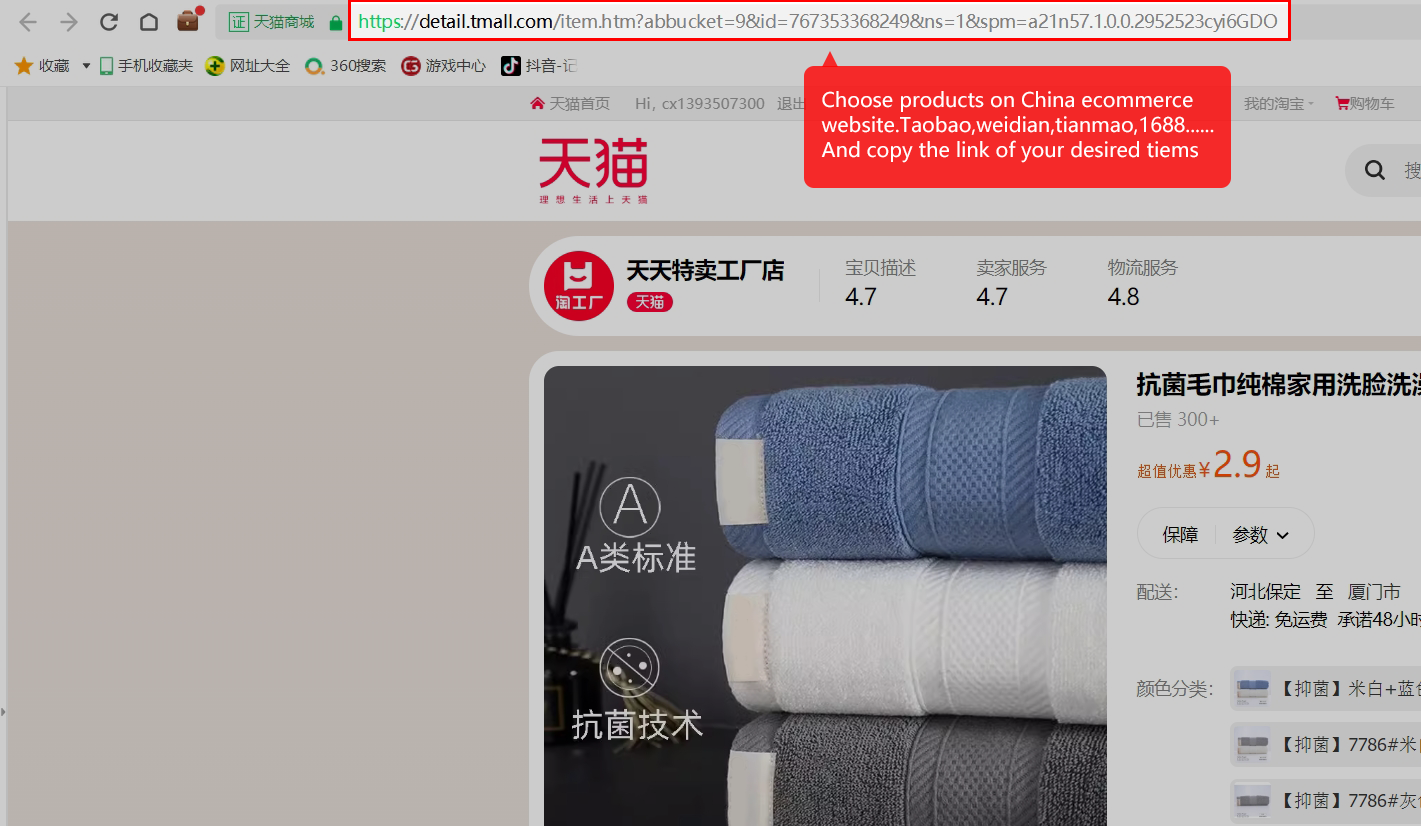
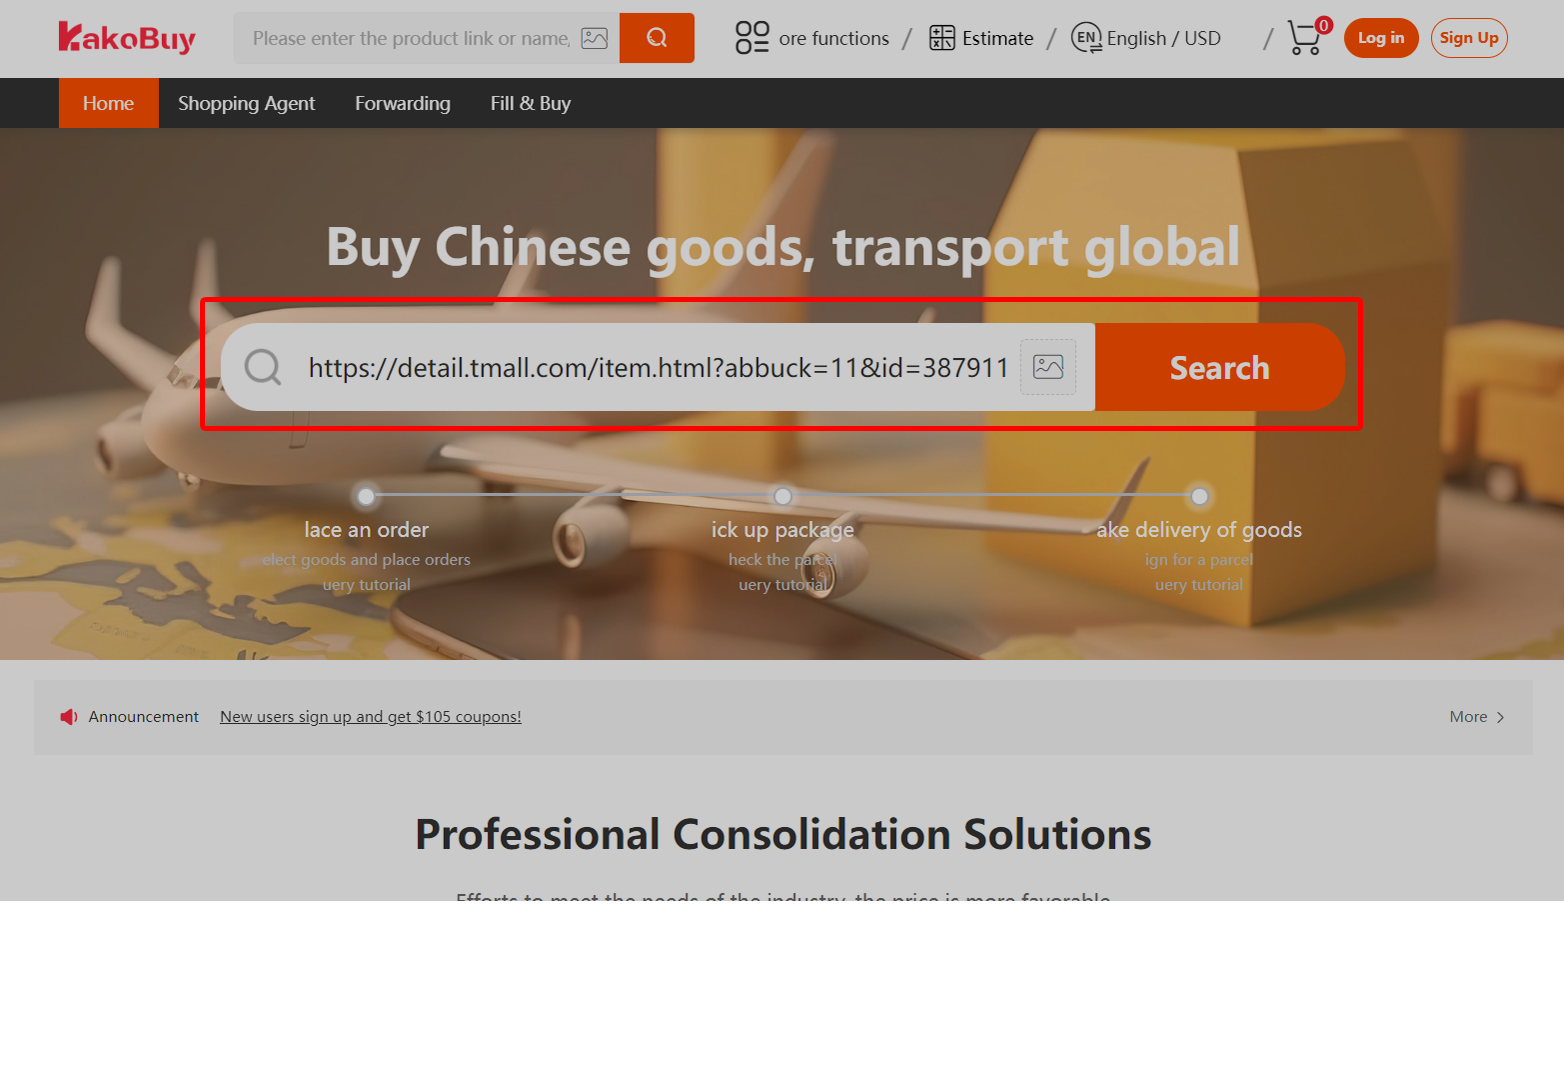
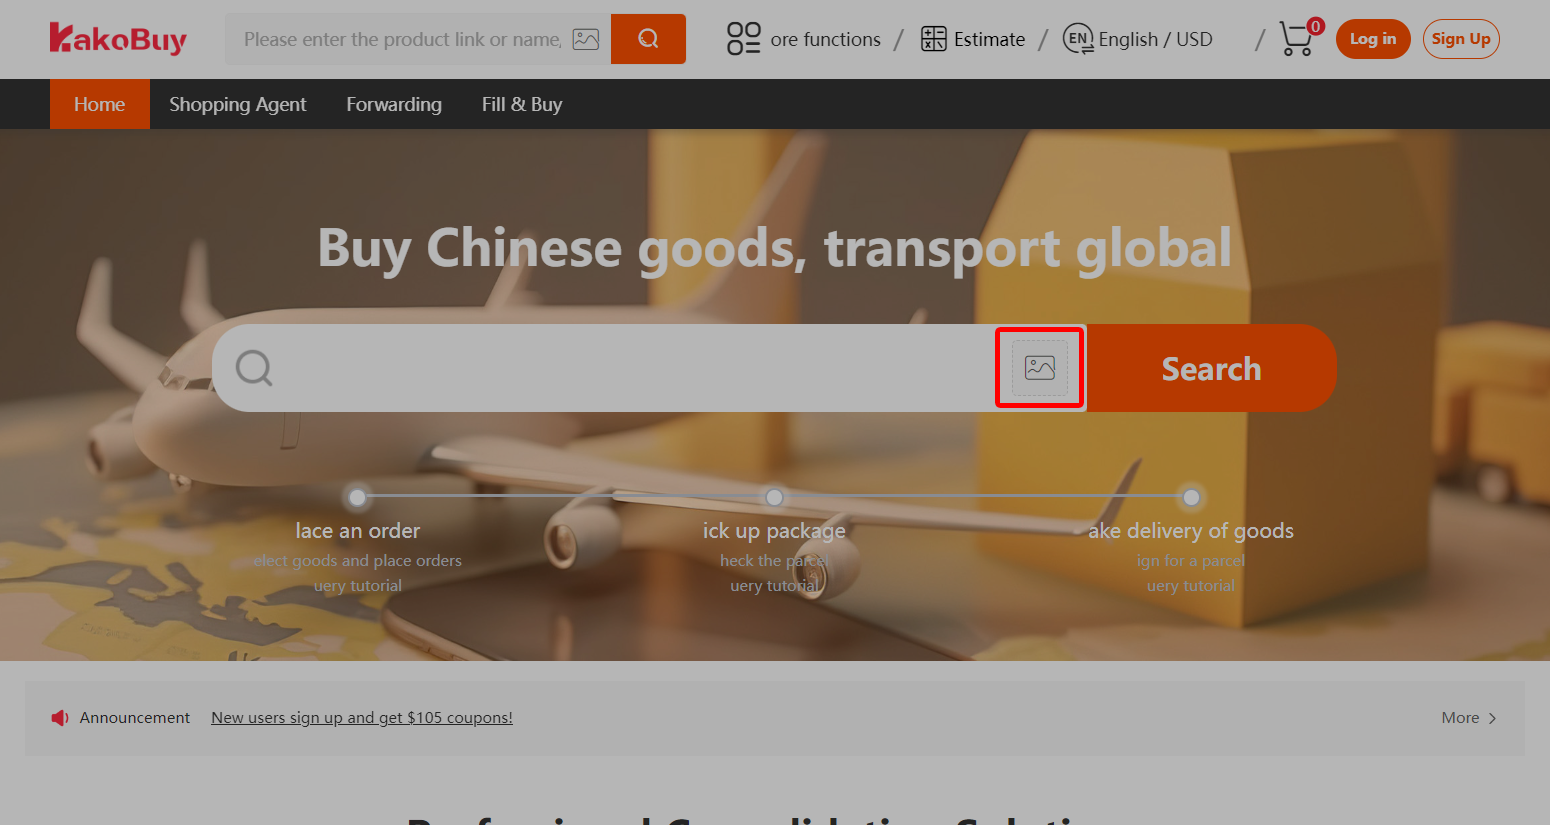
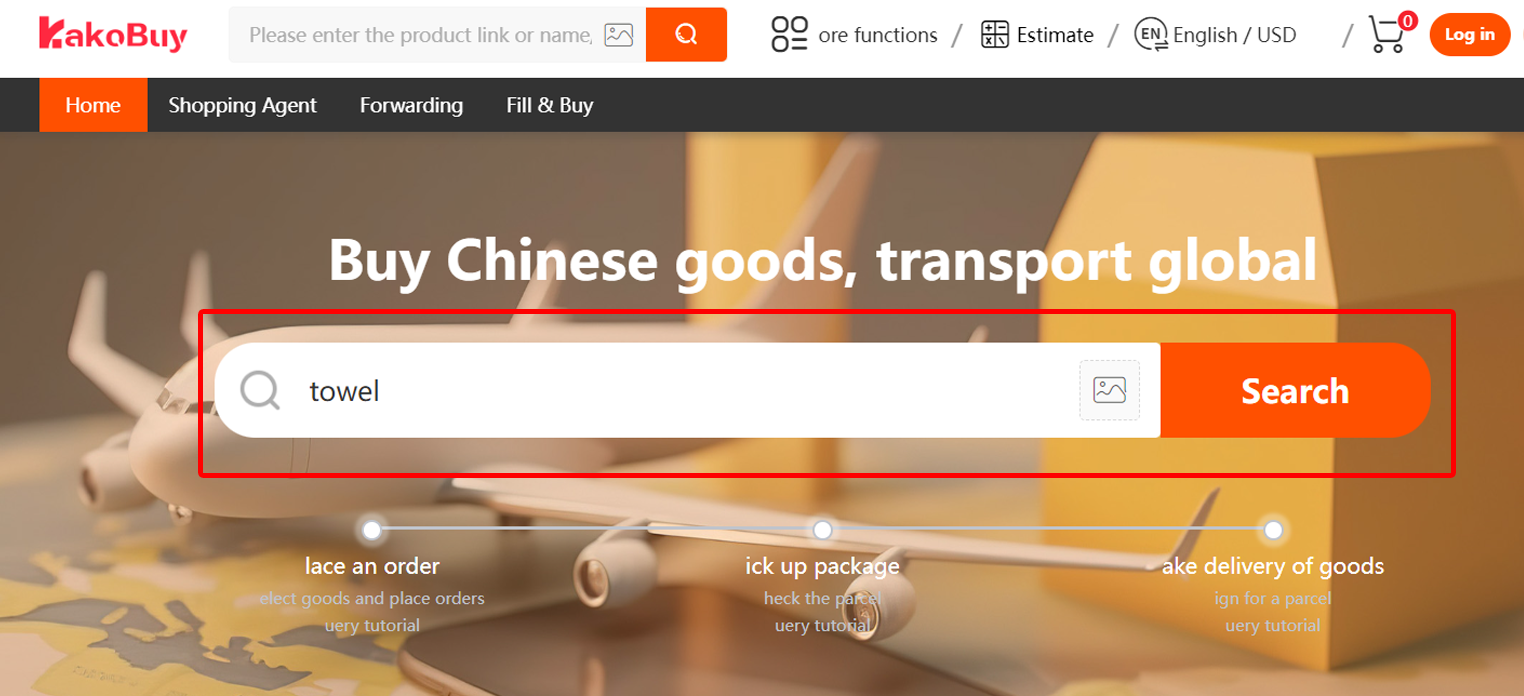
Select your products
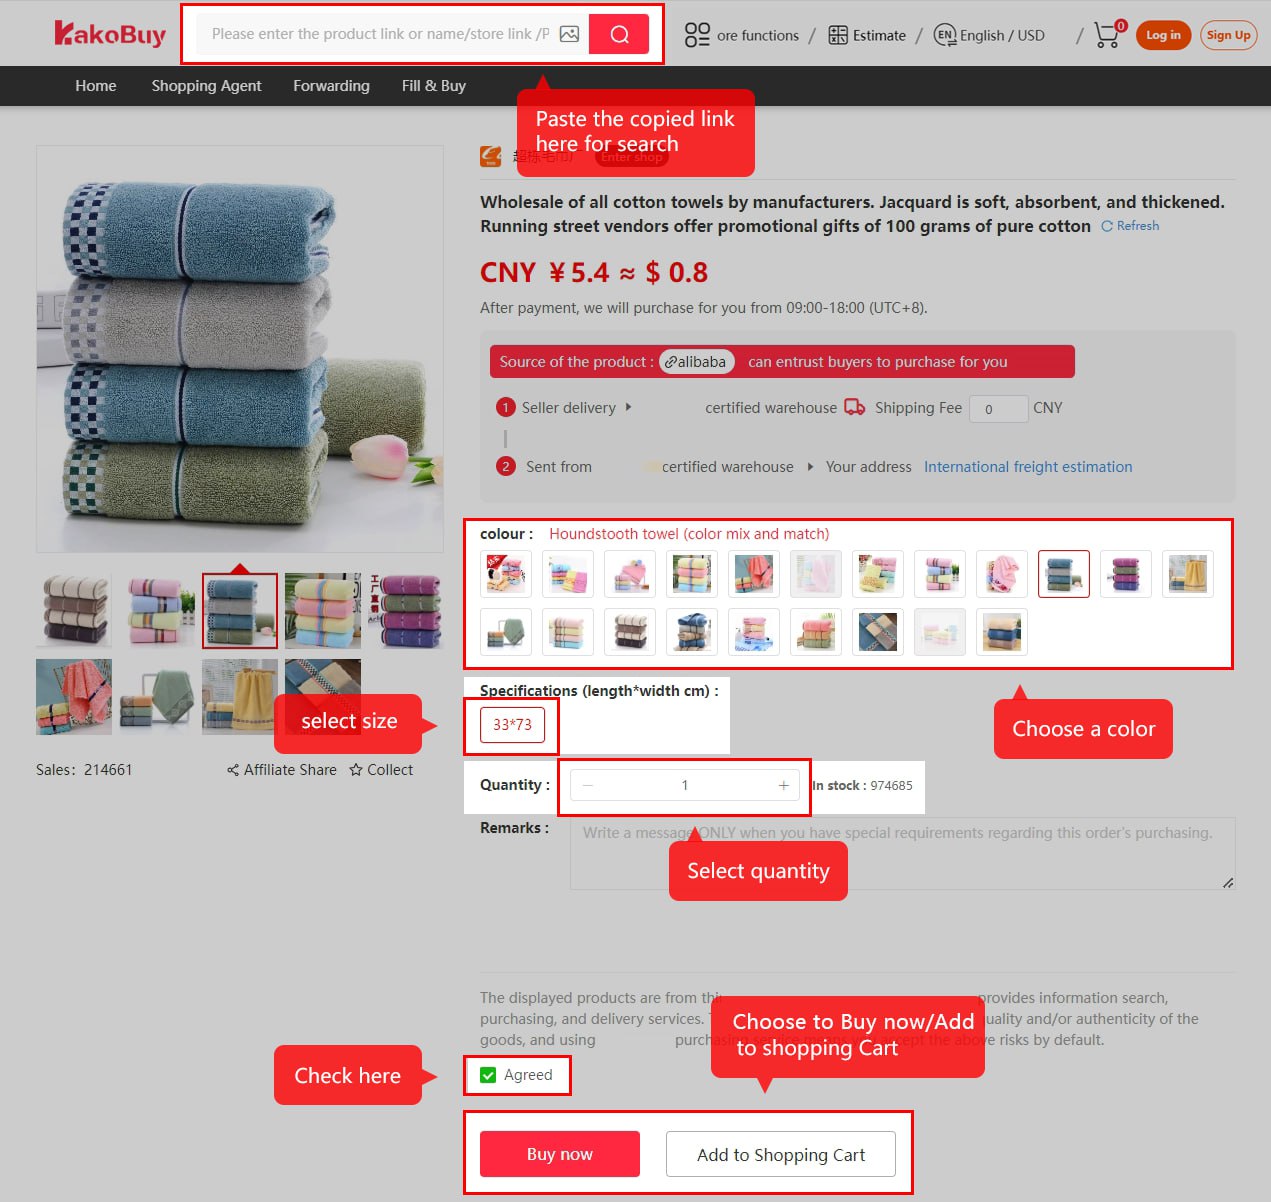
Method 1: copy the original product URL and paste it into Kakobuy. The first two pictures show those actions in order. Method 2 uses the image-search button. Method 3 searches by product name. Compare the actual seller listing before choosing a result; a matching photo does not prove the same seller or stock.
If the product cannot be read automatically, use the manual order branch shown at step 2. In community language, this is the W2C link becoming an orderable listing.
Submit the purchasing order
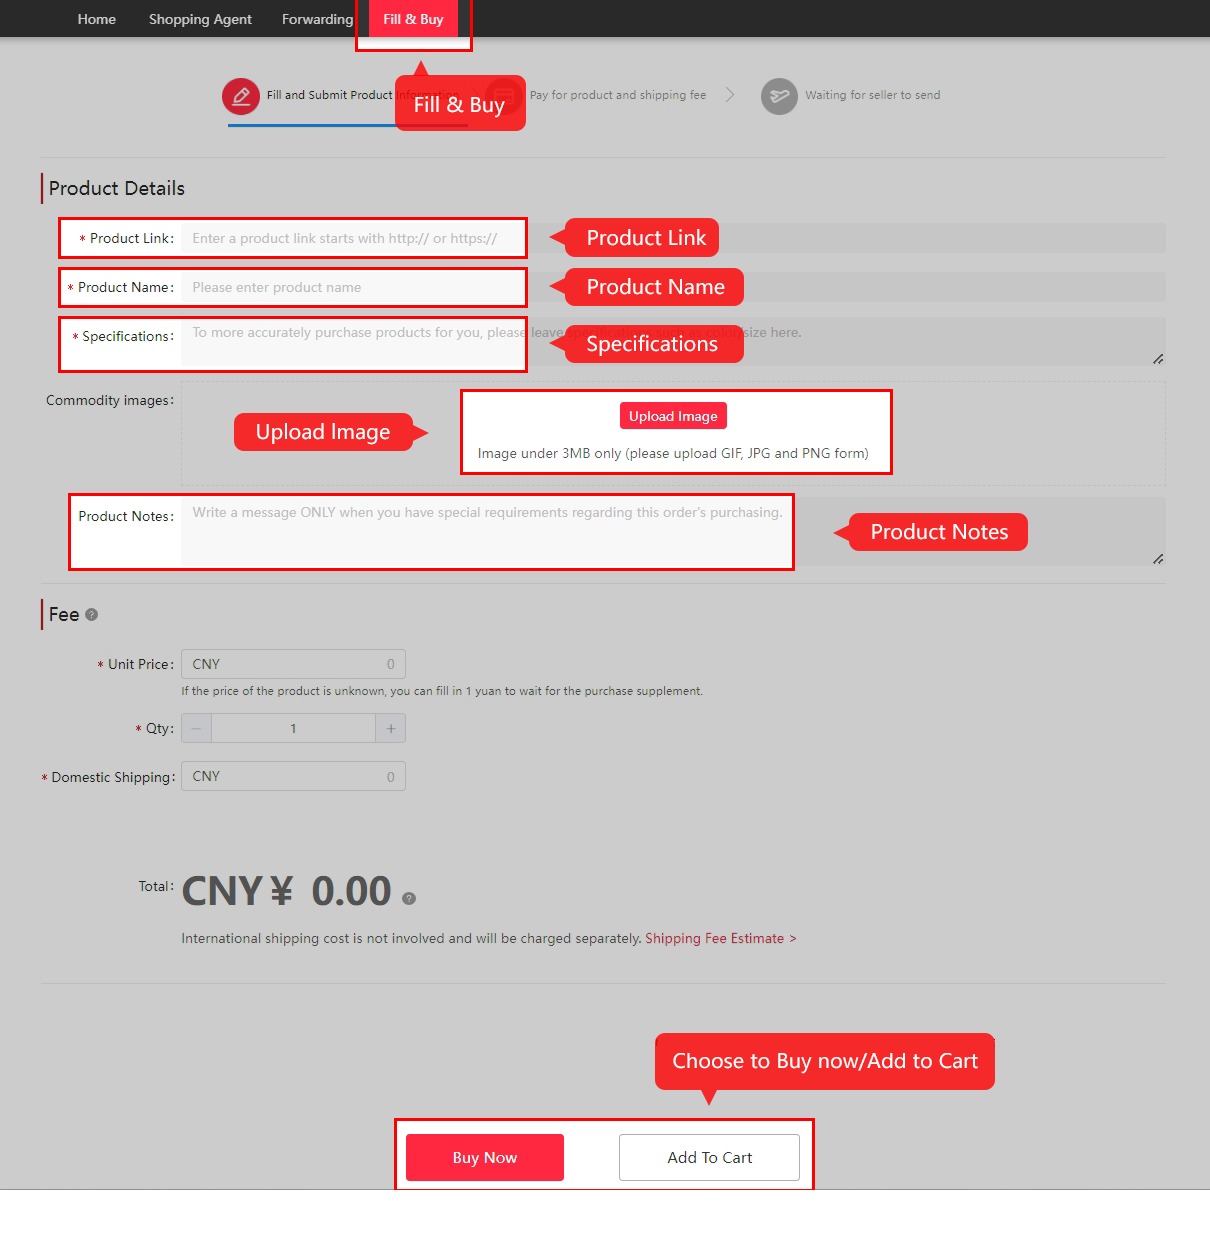
Select the required colour, size and quantity, then review the item price and domestic delivery. For a manual Fill & Buy order, enter the seller URL and exact specification; ask for clarification before paying if the unit or minimum quantity is unclear.
The second image shows the official Fill & Buy alternative. Enter the product link, exact variant, image, price and seller-to-warehouse delivery cost. Review the current form and manual-order terms before paying.
Pay for the goods and domestic delivery
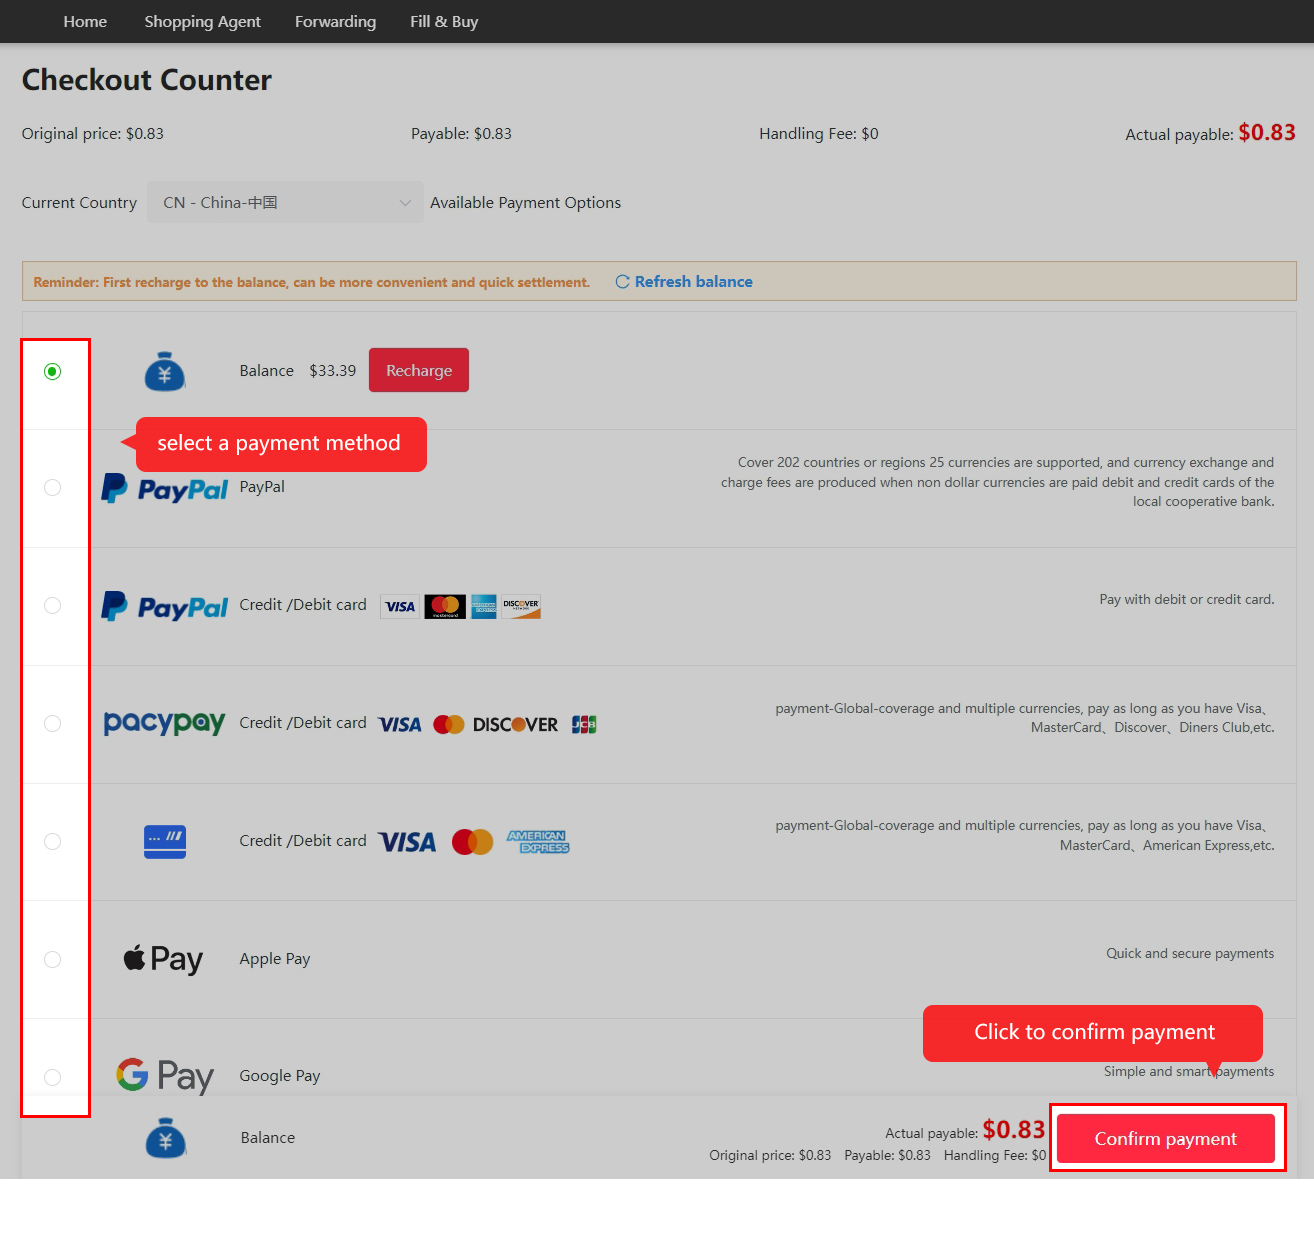
This first settlement places the purchasing request. Check the chosen variant, quantity, currency and payment charges before confirming. It does not pay international freight. Keep a realistic allowance for the later parcel instead of spending the entire budget on products.
Wait for review, purchase and seller dispatch
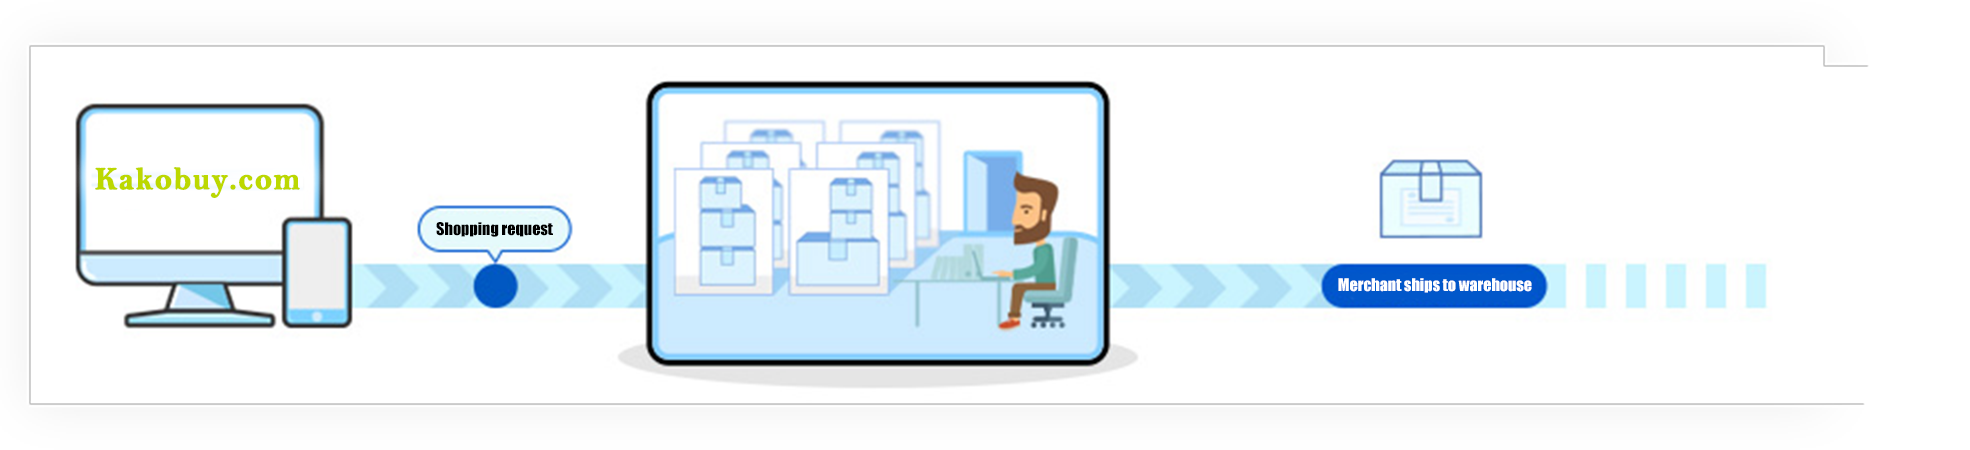
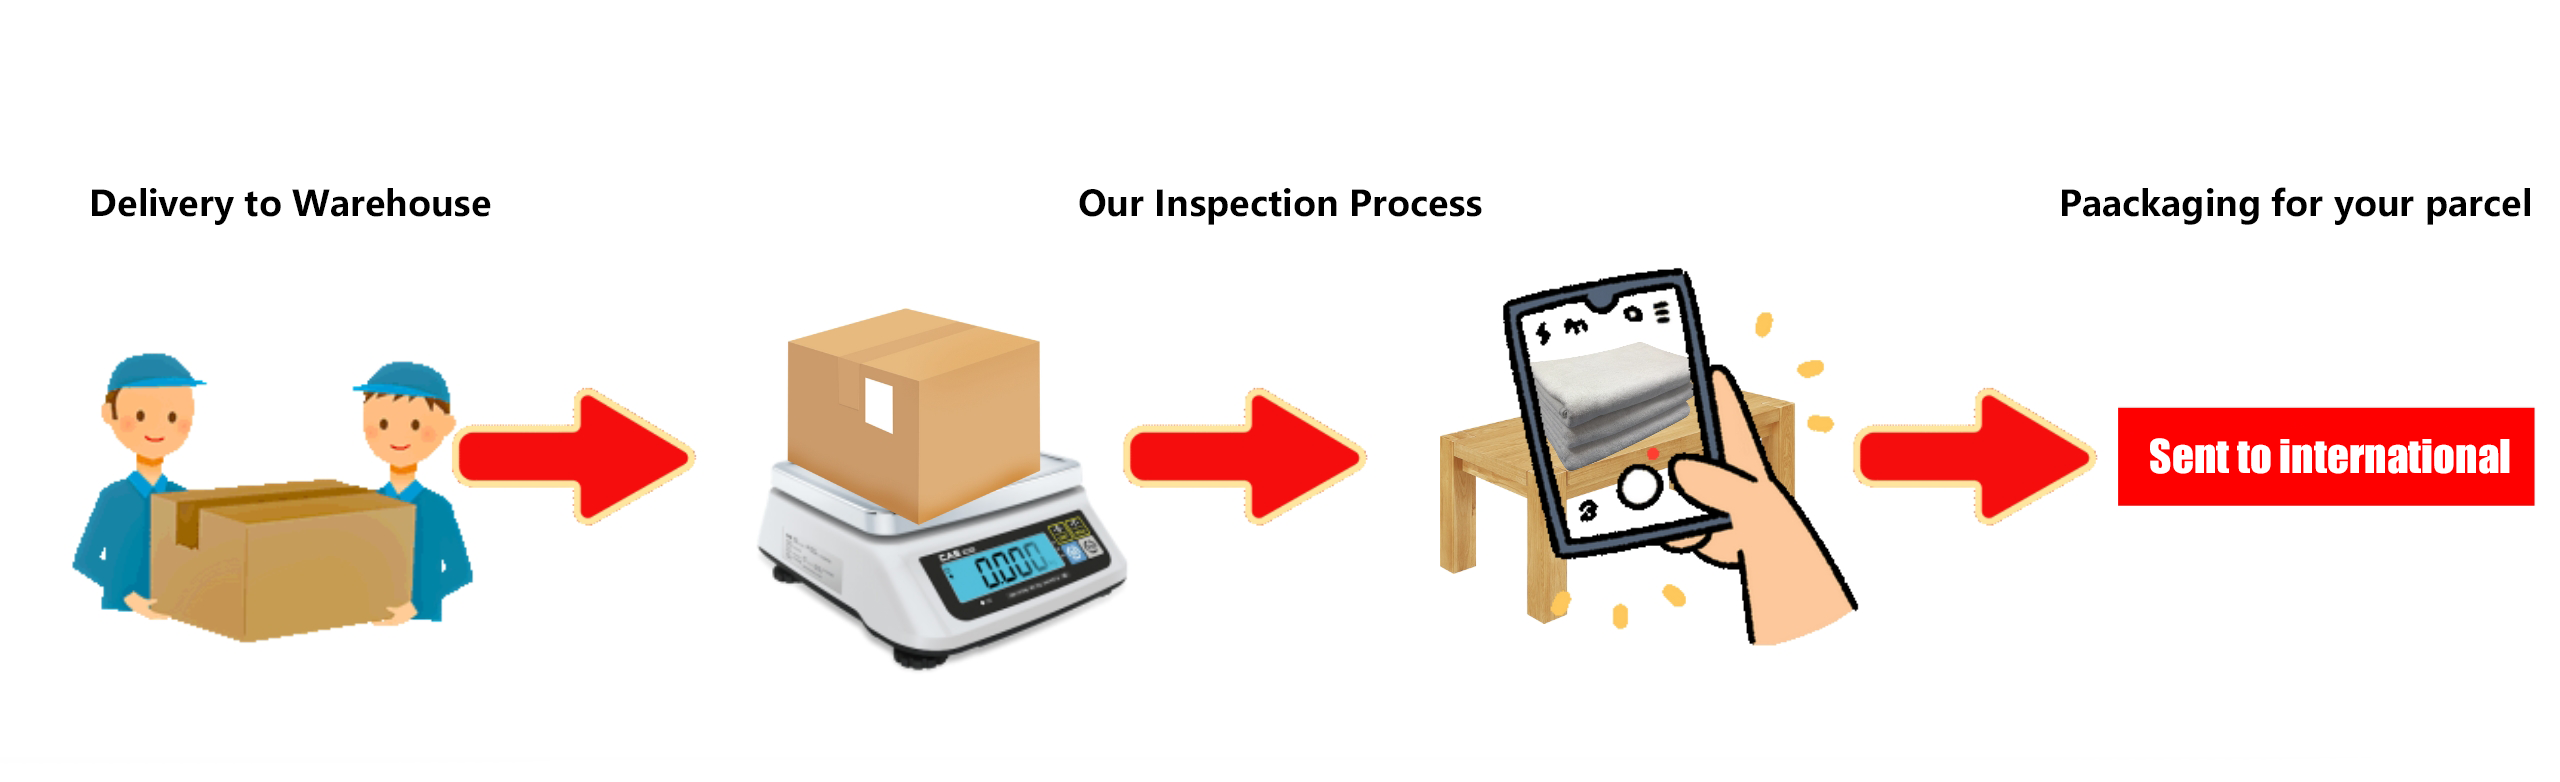
Kakobuy reviews the request, places the seller order and waits for domestic delivery to its warehouse. Processing and transport are different statuses. If the seller needs a substitution or a specification is unclear, resolve it through the order message rather than approving an unspecified replacement.
Check inspection photos and storage
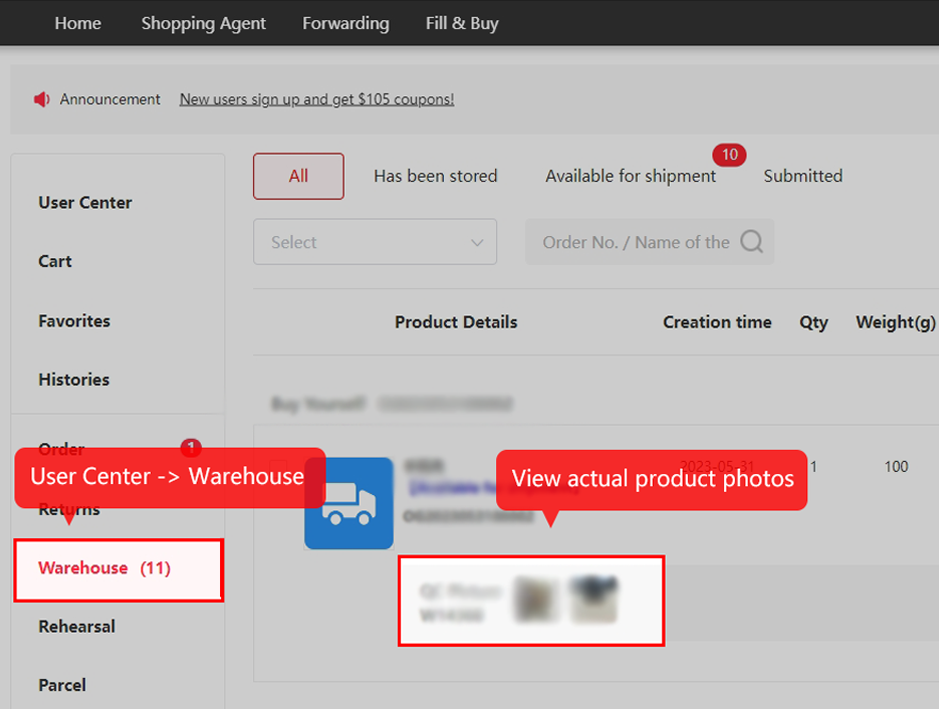
Open the stored item and inspect the actual photos against the selected variant. Check visible colour, style, labels, quantity and damage. Ask for a specific measurement or extra view when the default photo cannot answer your question. Visual inspection does not authenticate a product or test electronics.
This is where a community QC opinion may help, but the order record and applicable return window govern what you can do. Use the detailed inspection checklist.
Submit the parcel and pay international charges
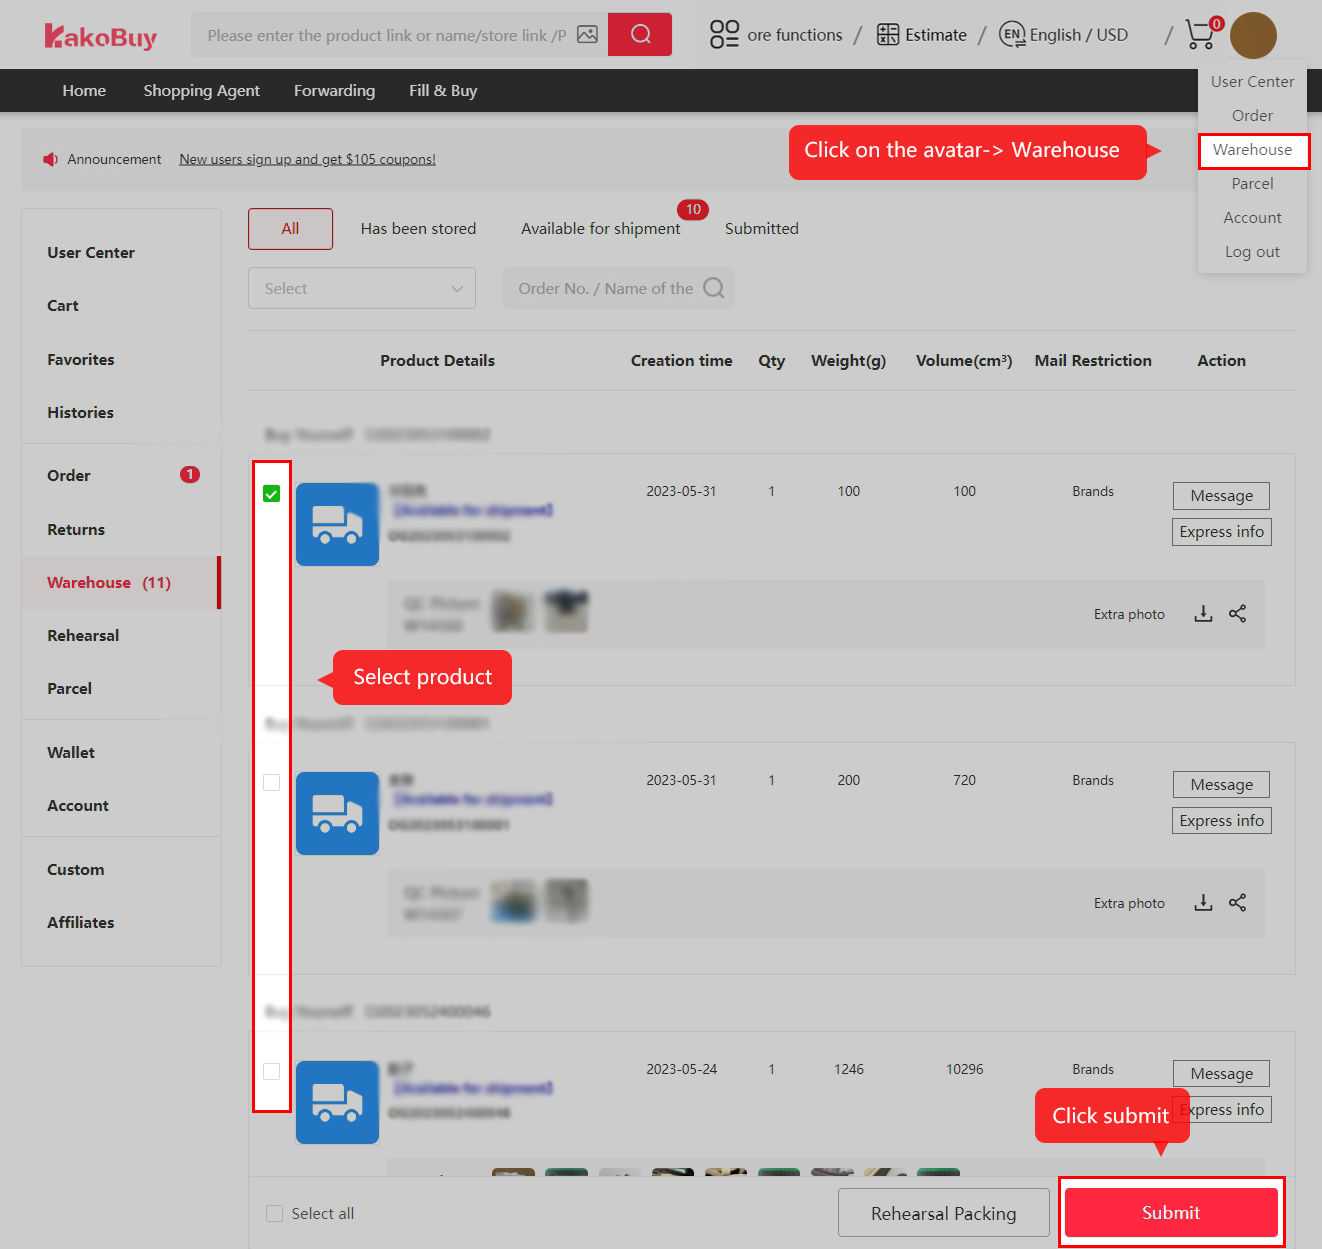
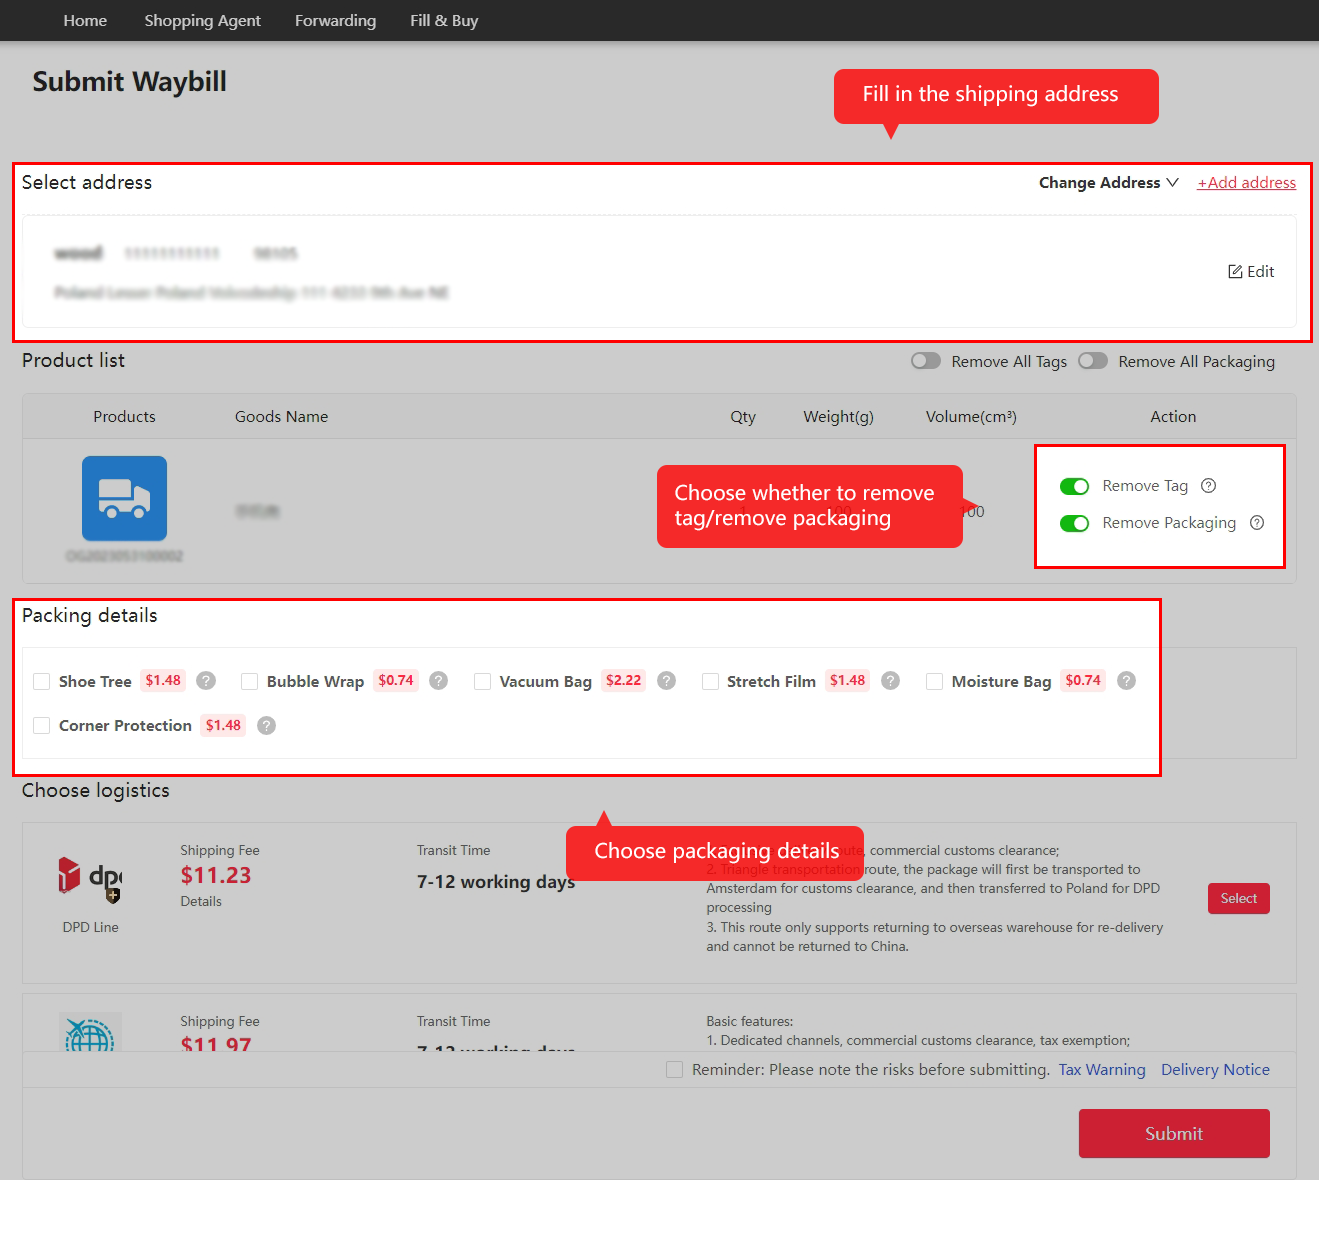
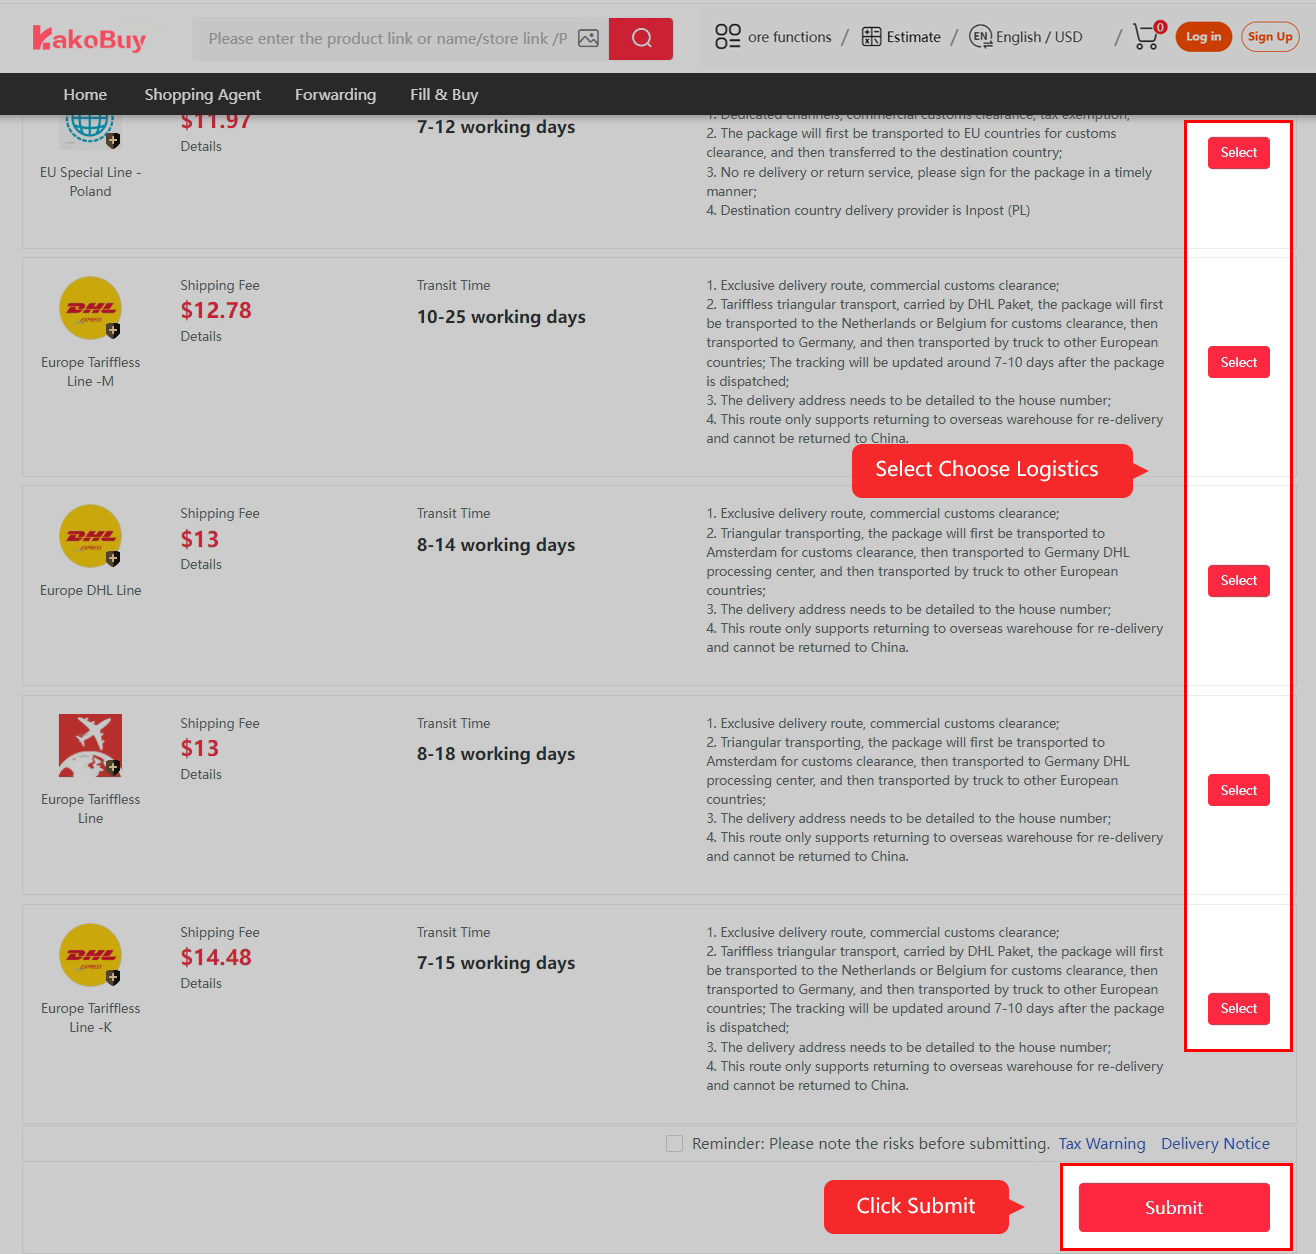
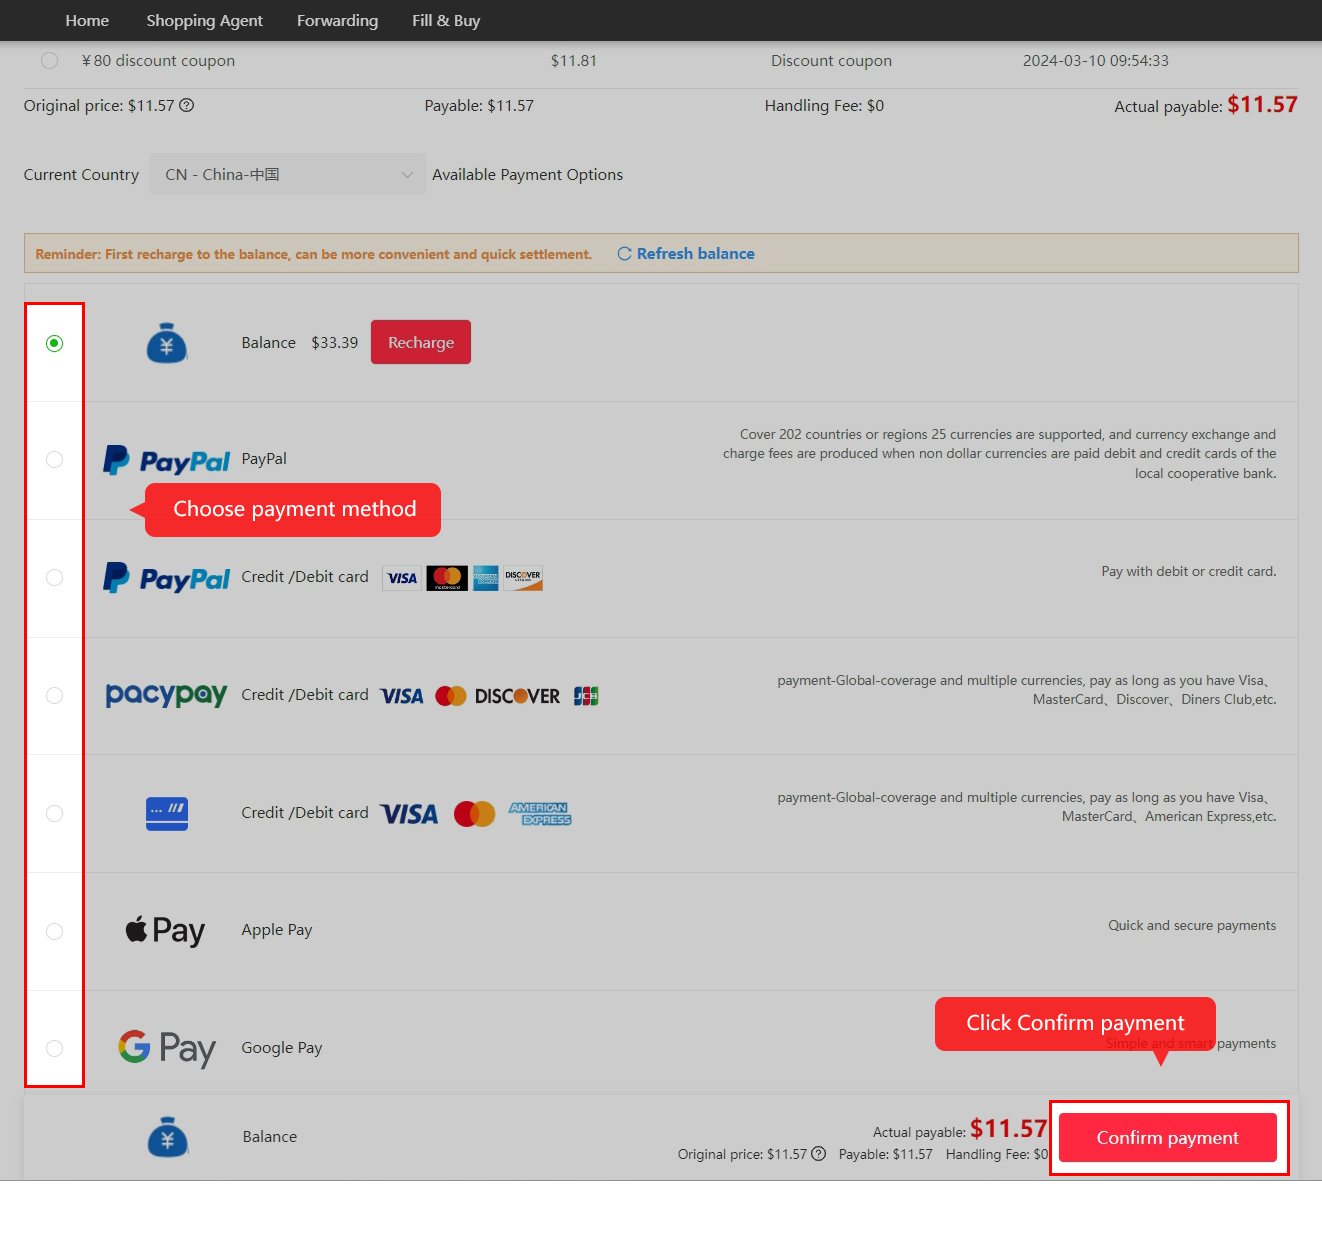
Select the stored items, enter the delivery address, review tag and packaging choices, select an eligible logistics route and pay the parcel charge. The four screenshots below follow that exact sequence. Keep tags if you may still need the return option.
Use your actual destination and goods restrictions. Compare packed dimensions and chargeable weight, not only the item weights. The old Poland route prices in the pictures are examples. Read the current route conditions and checkout total before paying.
Follow packing, outbound handling and tracking
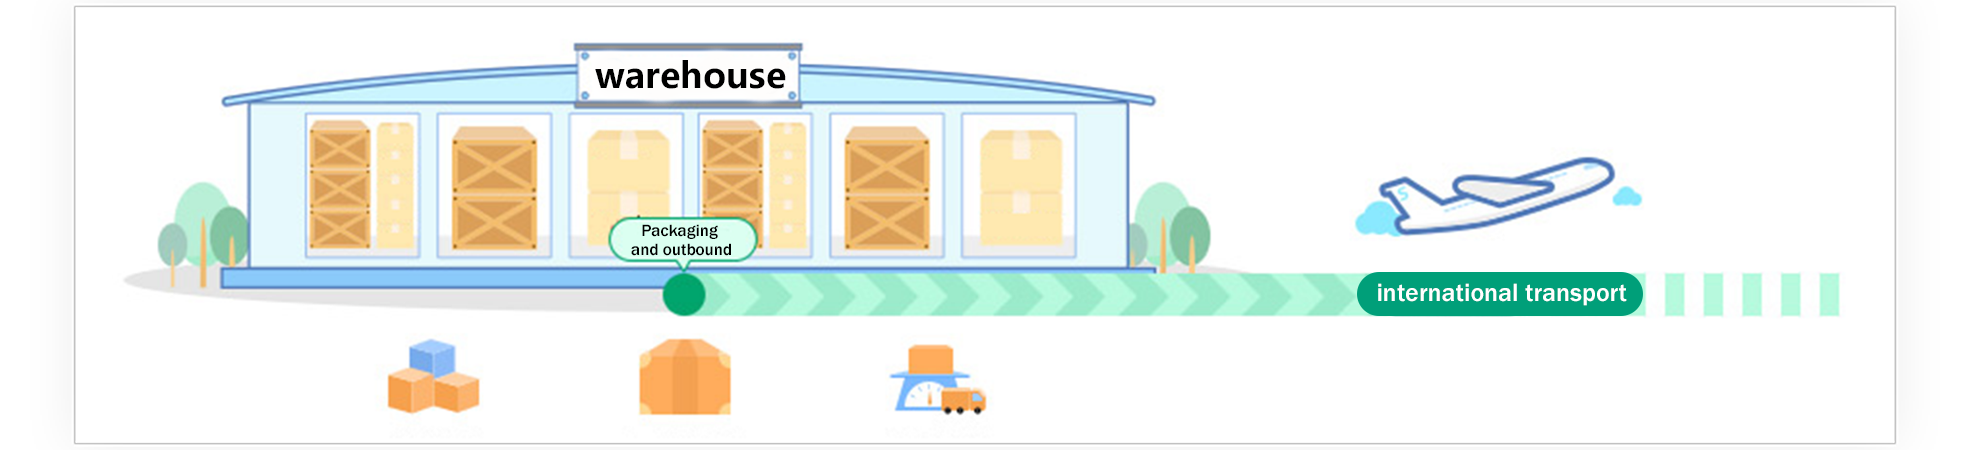
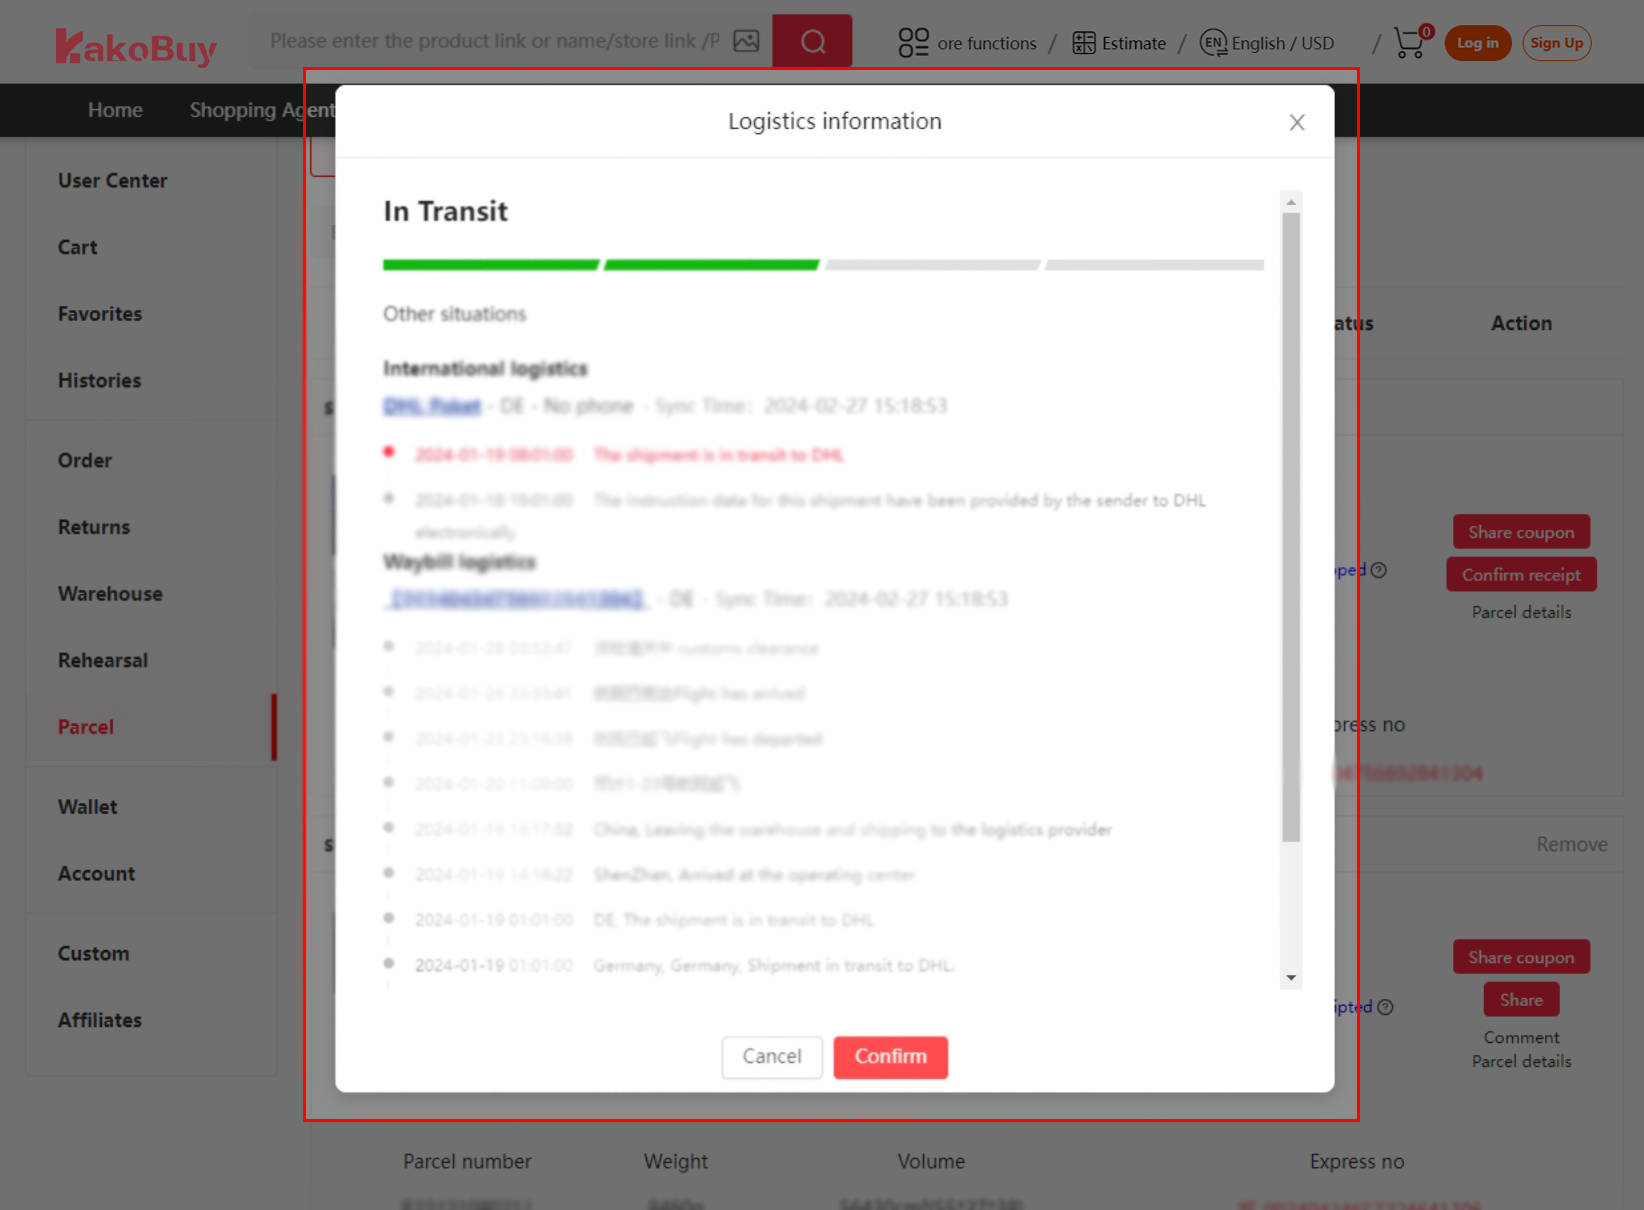
After parcel payment, follow the outbound and carrier status in the parcel record. A label or early tracking number does not establish that the carrier has scanned the parcel. Some routes update only after a handover; compare any gap with that route’s stated tracking behaviour before reporting a delay.
Inspect delivery and confirm receipt
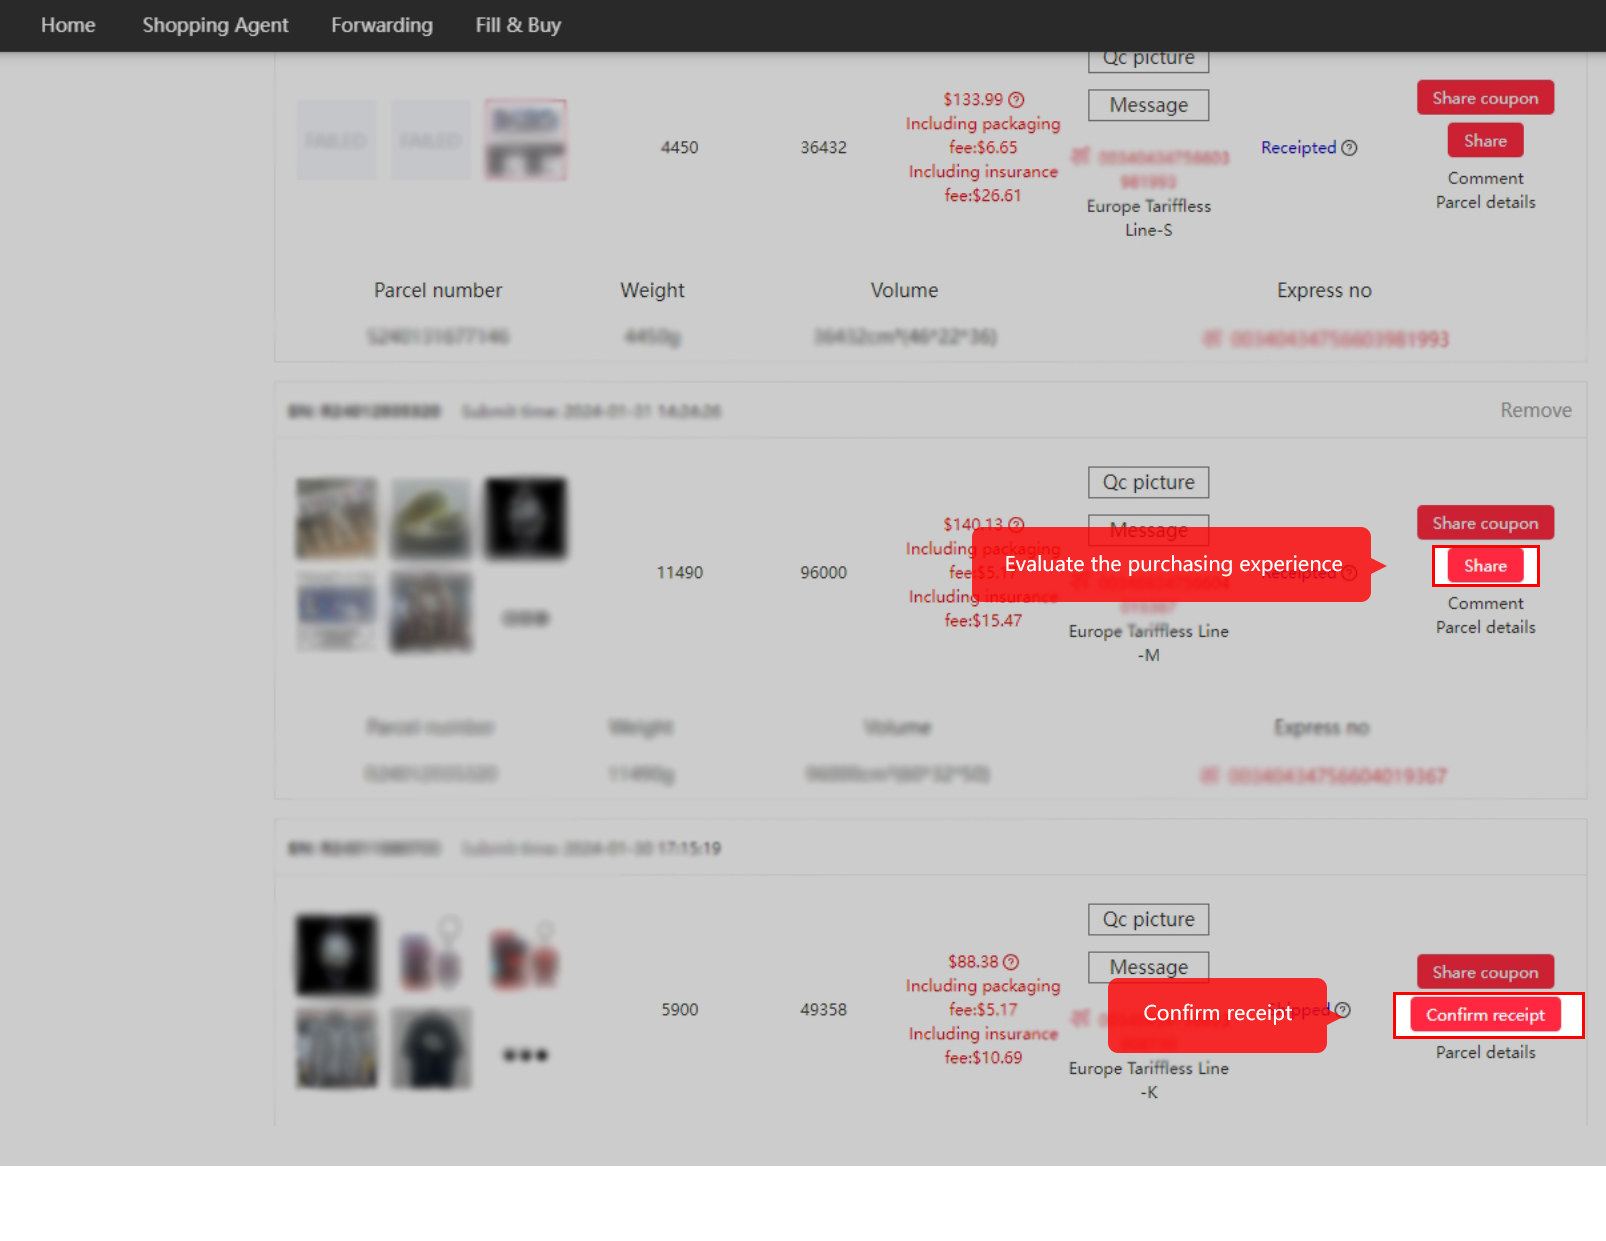
Check the outer packaging and contents when the parcel arrives. Keep clear photos and packaging if anything is missing or damaged, and raise the issue through the parcel support channel promptly. Confirm receipt in the parcel record after checking what arrived; posting a haul is optional.
Changing your mind: cancellations by order status
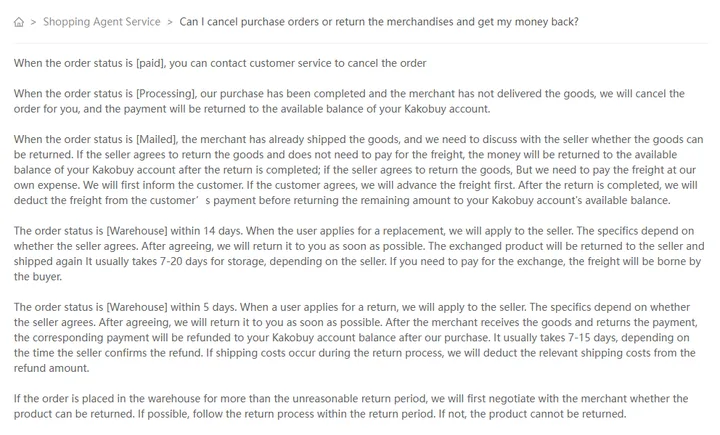
Cancelling depends on the order status, and the official statuses are worth knowing by name (help 87):
- Paid: contact customer service to cancel.
- Processing: purchased but not yet shipped by the seller; Kakobuy cancels and refunds to your balance.
- Mailed: the seller has shipped; return depends on the seller, and return freight may be deducted.
- Warehouse: help article 87 describes exchange requests within 14 days and returns within 5 days, with indicative processing times. Help article 51 describes a separate eligible return/exchange service with a 5-day / 120-hour window. These pages do not establish a universal deadline for every order. Contact support promptly with the order number and ask which service, starting timestamp and seller conditions apply; do not wait for day 14 on that assumption.
Refunds land in your Kakobuy balance first. Withdrawing to the original method is a separate request with its own terms (help 104).
Content reviewed: .